
Method 2
1. Create a New Folder on Your Computer
Use this folder to collect all materials required for the project turnover to the colorist.
2. Check the Adobe Premiere Pro Settings
For the XML workflow recommended, set:
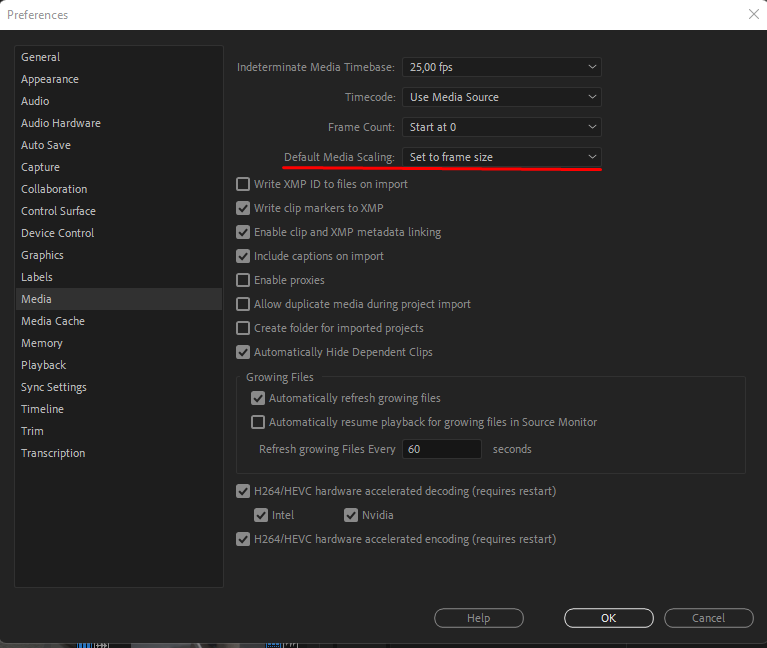
Edit → Preferences → Media
Default Media Scaling → Scale to Frame Size
3. Duplicate the Sequence
Duplicate the approved sequence and use the duplicate for all turnover preparation.
4. Relink Clips to the Original Source Media If Proxies Were Used
If the proxy files were attached through Premiere Pro’s built-in proxy workflow, select the relevant clips and choose:
Proxy → Reconnect Full Resolution Media
If the sequence is linked directly to proxy files, select the clips and choose:
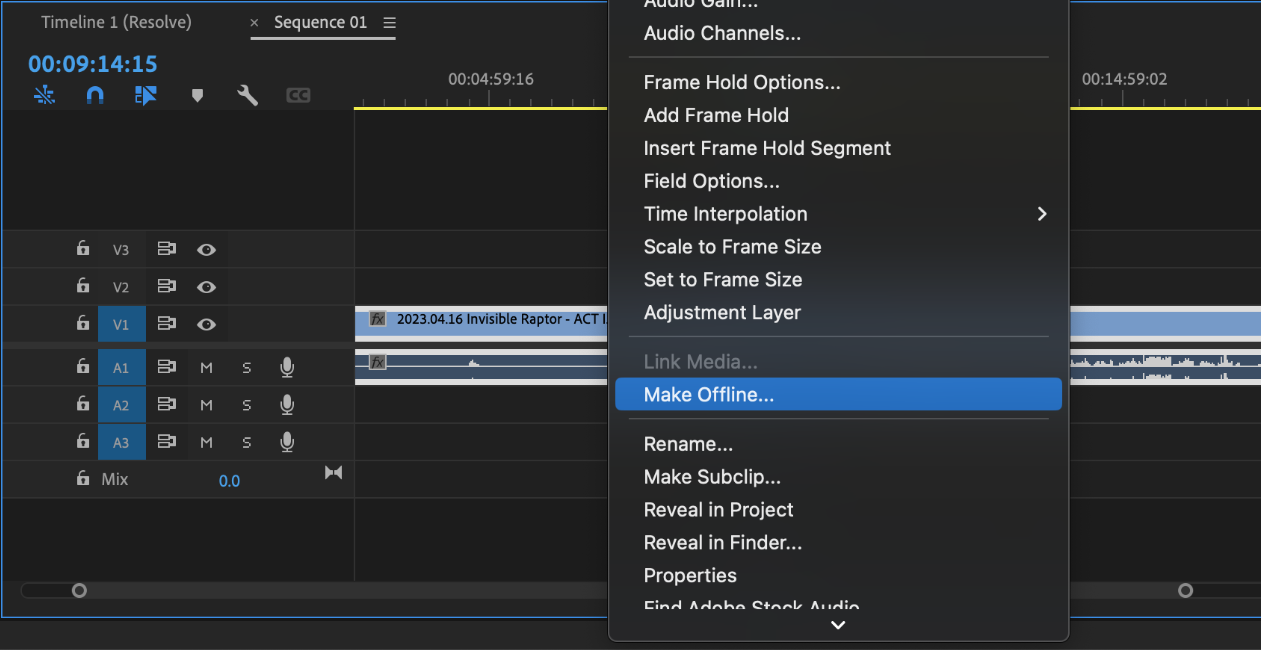
Make Offline…
Then select:
Link Media
Reconnect the clips to the original full-resolution source media — not the proxy files.
5. Export Guide Audio
Export a .wav file of the picture-locked sequence, even if the audio has not yet gone through final sound mixing.
This will allow the colorist not only to verify sync after the project turnover, but also to better understand the mood and atmosphere created by the director and cinematographer.
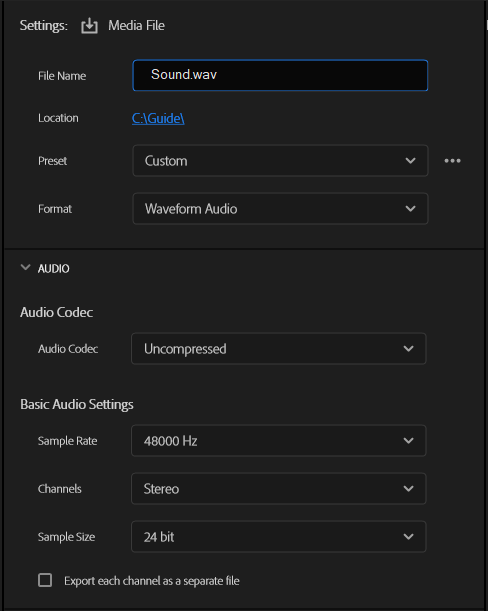
| Setting | Value |
|---|---|
| Format | Waveform Audio |
| Audio Codec | Uncompressed |
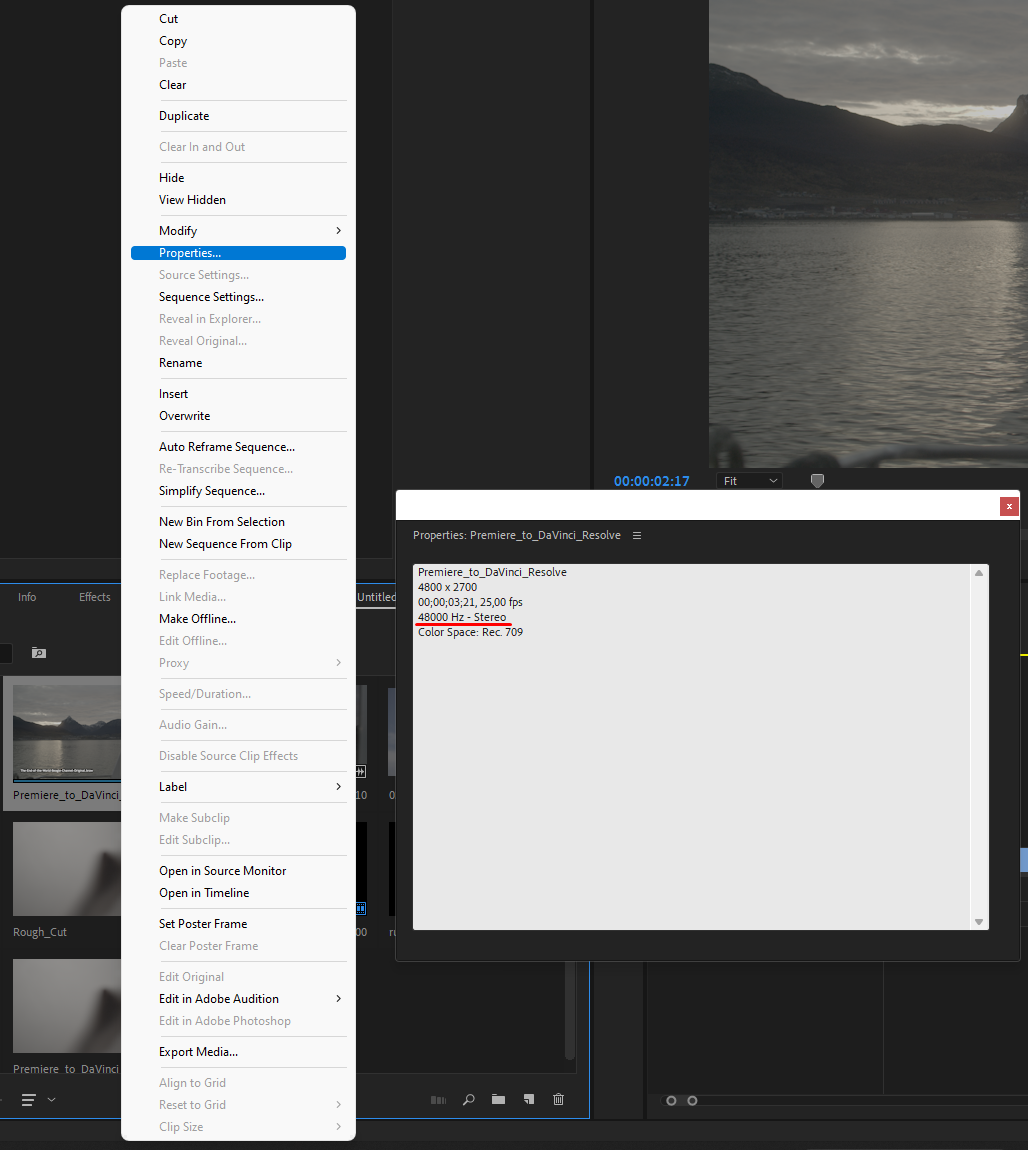
| Sample Rate | Same as Sequence |
| Bit Depth | 24-bit |
How can I check the sequence sample rate?
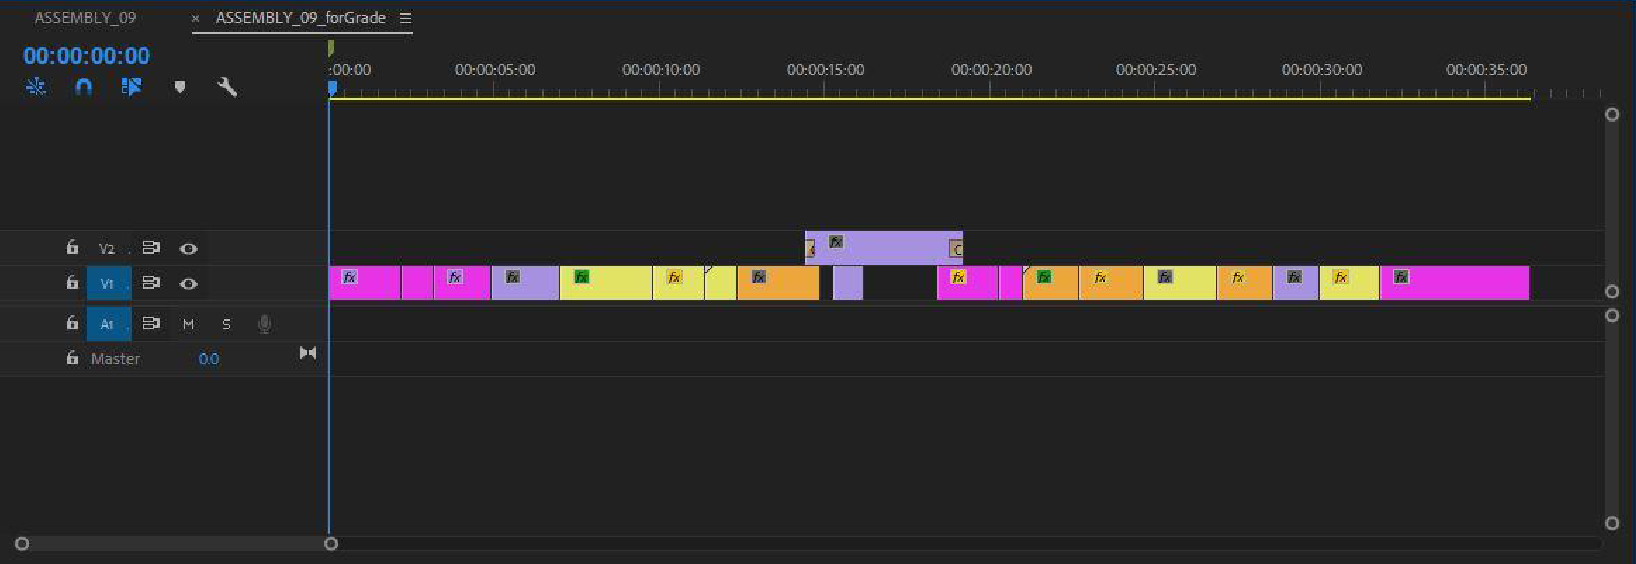
6. Prepare the Sequence
- Unnest all nested sequences.
- Where possible, arrange all used clips on the lower video tracks, such as V1 and V2.
- Do not leave unused media in the sequence.
Without Changing the Sequence Duration, Remove:
— Titles and subtitles
— Audio
— Effects, including Warp Stabilizer, Twixtor, blur effects, MOGRT graphics, and others
— Adjustment Layers
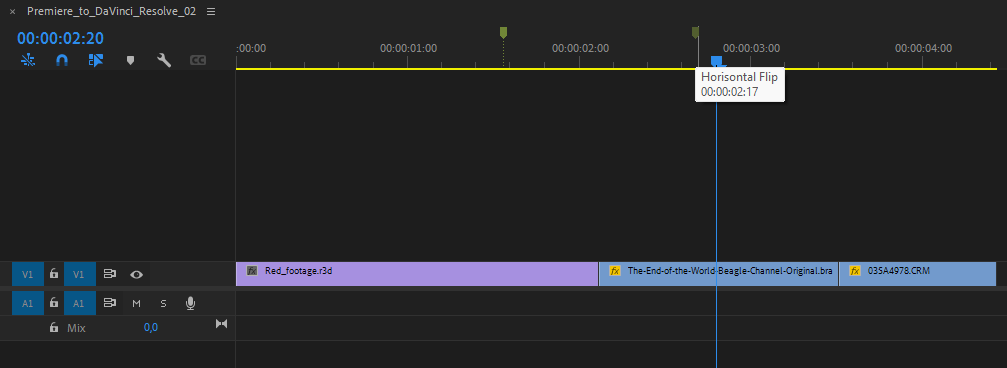
— Horizontal Flip and Vertical Flip effects
— Blend Modes
— Masks
— Morph transitions
You May Keep:
— Scale, Position, Opacity, and Rotation settings
— Scale, Position, Opacity, and Rotation animation, but only with Linear Interpolation
— Speed ramps, but only with Linear Interpolation
— Crop
— Speed/Duration changes
— Reverse Speed
— Cross Dissolve, Dip to Black, and Dip to White transitions
— Multicam sequences, but only after they have been flattened
7. Export an Offline Reference
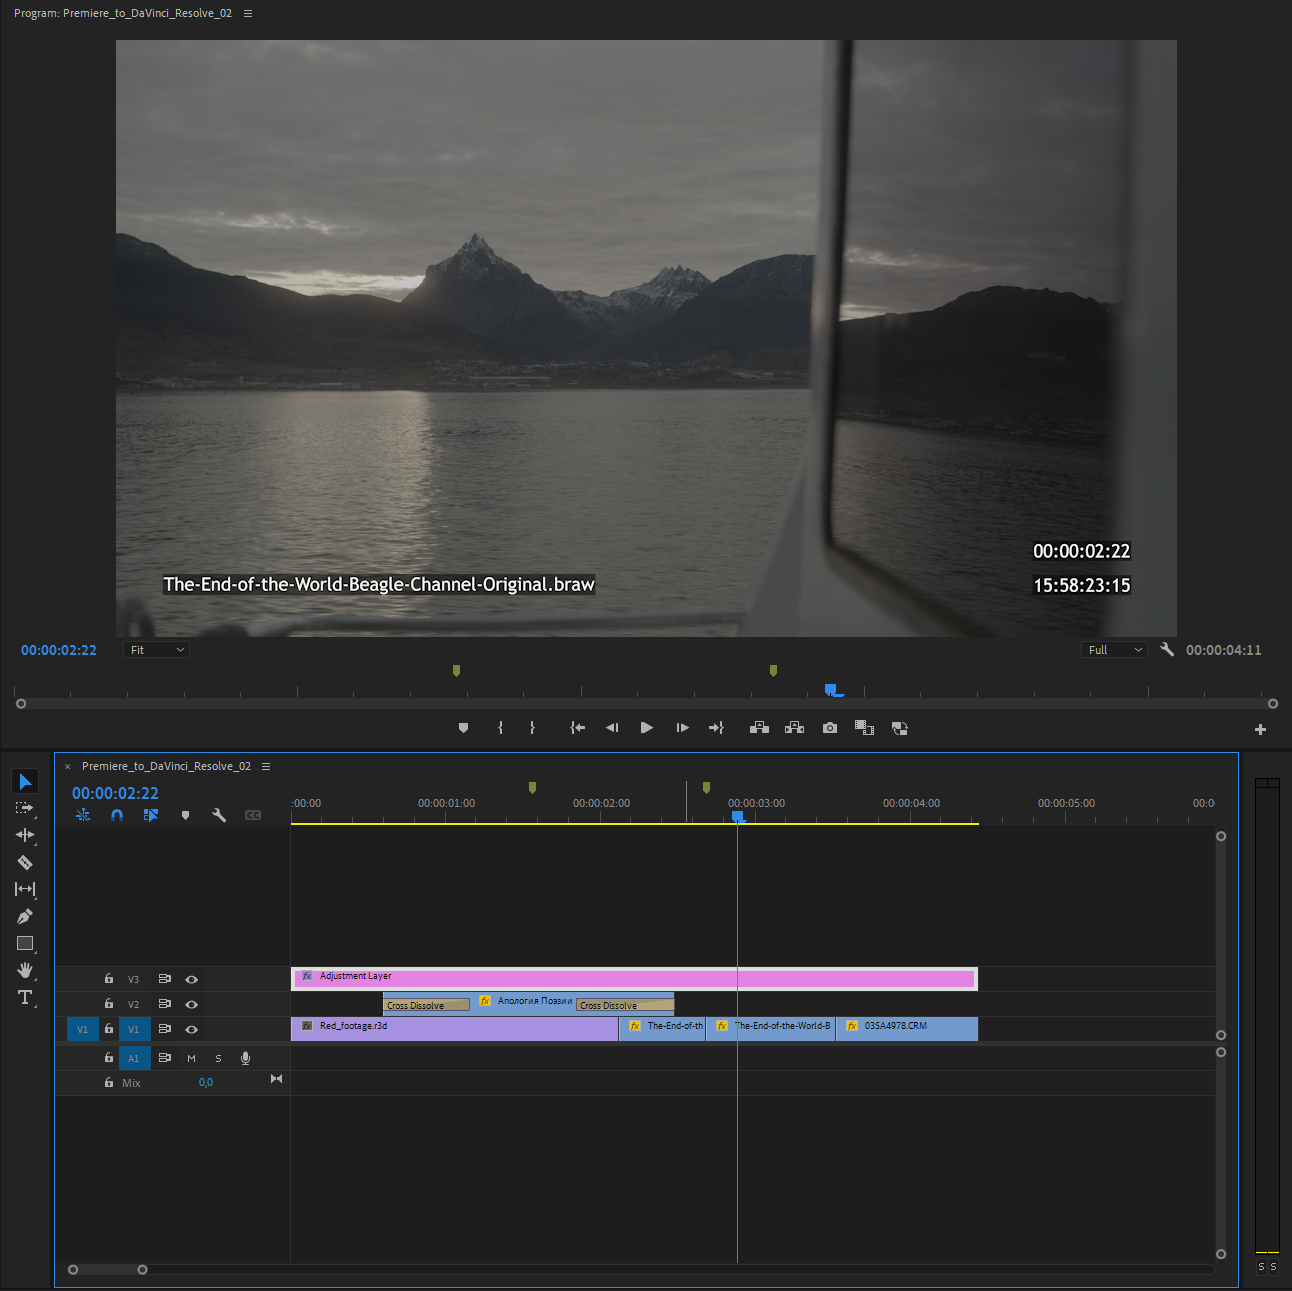
The Offline Reference must show the same prepared sequence that will be delivered for color grading.
The colorist will use it to verify that the edit and source media have been transferred correctly.
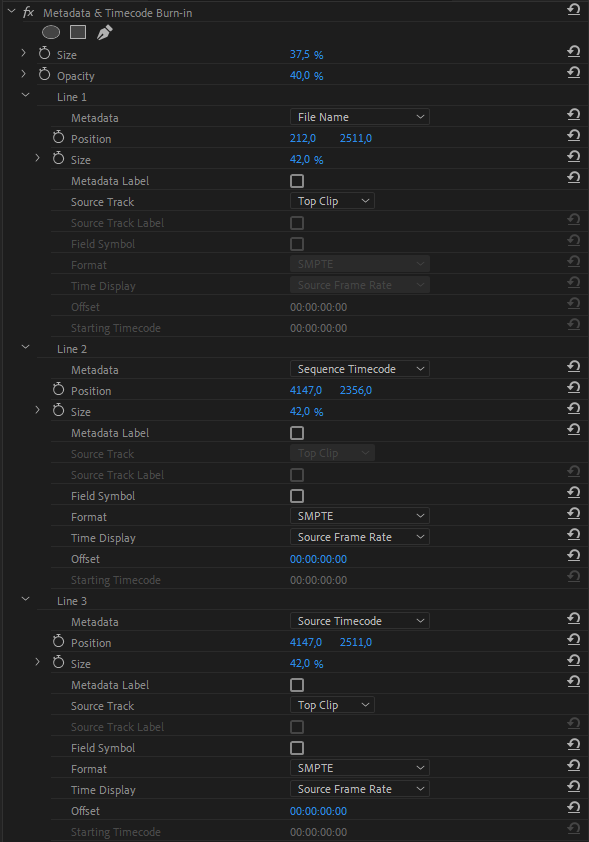
Create an Adjustment Layer and apply the Metadata and Timecode Burn-in effect.
Include:
— File Name
— Sequence Timecode
— Source Timecode
Export the Offline Reference using the following settings:
| Format | QuickTime |
|---|---|
| Video Codec | H264 / H265 |
| Frame Rate | Same as Sequence |
8. Collect the Source Media Used in the Sequence
Open:
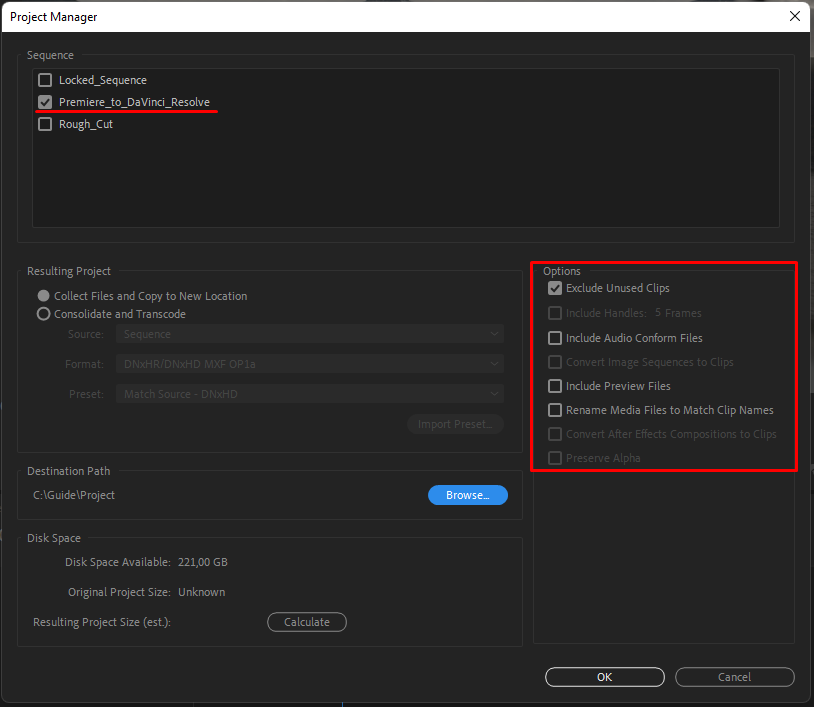
File → Project Manager
- Select the sequence that will be delivered to the colorist.
- Select:
Collect Files and Copy to New Location
- Under Options, disable all checkboxes except:
Exclude Unused Clips
- Select the folder where the original source media should be copied.
9. If the Project Includes CG
RAW footage sent for cleanup, compositing, or graphics work should be debayered into a wide-gamut color space and Log transfer function when transcoded to Apple ProRes 4444.
| Camera | Gamut / Color Space |
|---|---|
| Red | IPP2 / REDWideGamutRGB / Log3g10 |
| BlackMagic | DaVinci Wide Gamut / DaVinci Intermediate или ARRI Wide Gamut 3 / ARRI LogC3 |
| Canon | Cinema Gamut / Canon Log 2 |
After cleanup or compositing, the completed shots or graphics should be returned to the editor and subsequently delivered for color grading using the following specifications:
| Color Space | Original Log |
|---|---|
| Codec | Apple ProRes 4444 / EXR Sequence |
| Resolution | Source Resolution |
In some cases, an Alpha Matte may also be required for graphic elements.
10. Export an XML of the Prepared Sequence
Choose:
File → Export → Final Cut Pro XML…
Save the XML file inside the turnover folder.
11. Upload the Prepared Folder to Our FTP Server
The folder should contain:
- Original source media
- Guide audio
- Final Cut Pro XML file
- Offline Reference with File Name, Sequence Timecode, and Source Timecode burn-ins
- Adobe Premiere Pro project file
We recommend using FileZilla for file transfers. It provides fast and stable uploads and can automatically resume interrupted transfers.
After launching FileZilla, enter the following information in the bar at the top of the application:
- Host
- Username
- Password
- Port
To receive your access details, contact us via ✈️ Telegram or 📩 email.
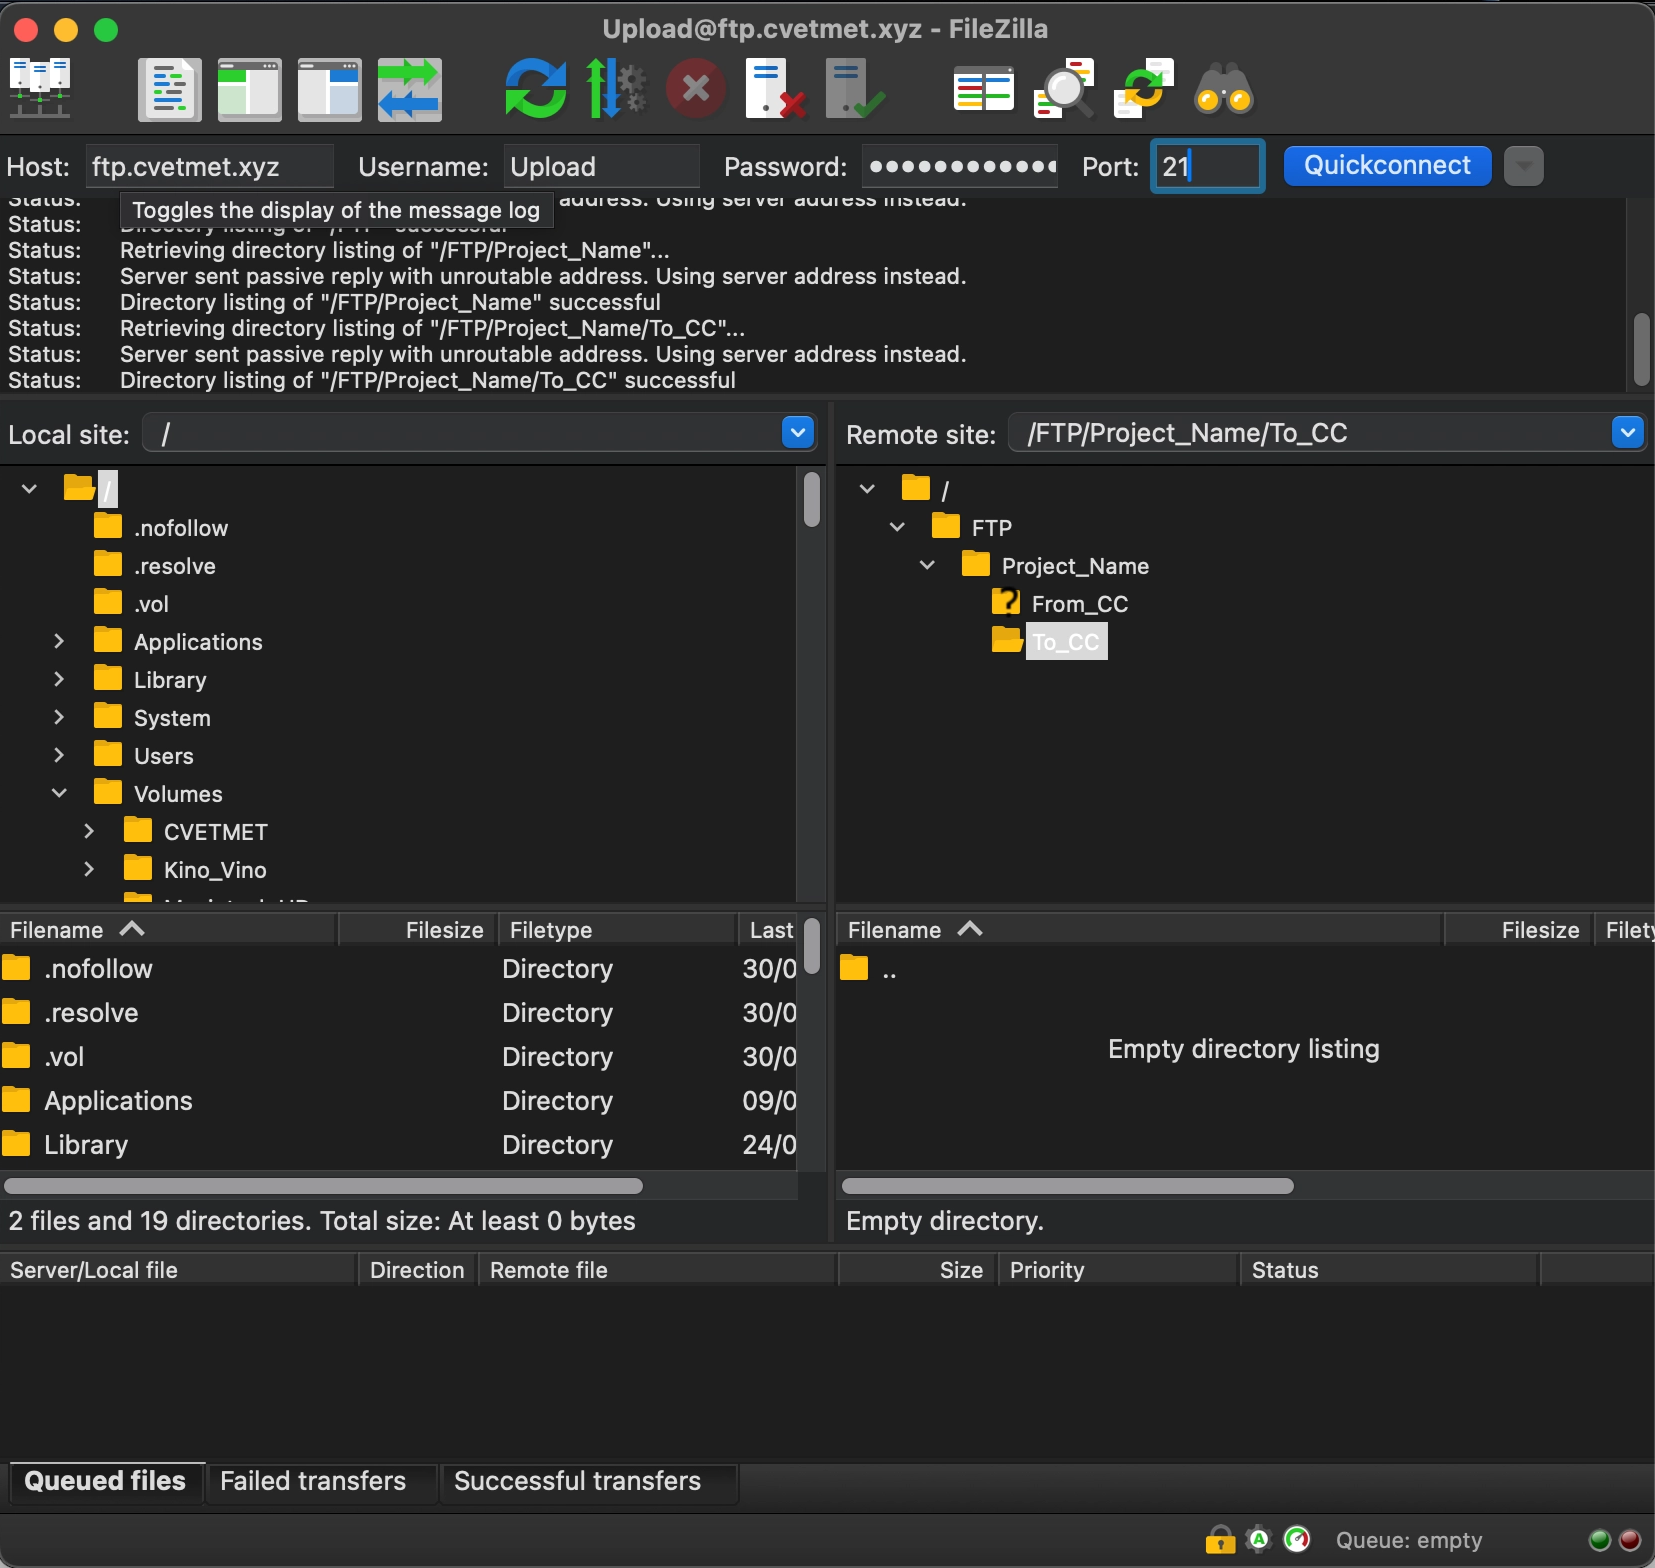
Upload all materials intended for color grading to:
To_CC — To Color Correction
After color grading is complete, the final deliverables will be available in:
From_CC — From Color Correction
When direct server transfer is not available, you may use Google Drive, Dropbox, WeTransfer, MyAirBridge, Yandex Disk, or another cloud storage or file-transfer service.
How can I transfer more than 50 GB using cloud storage?
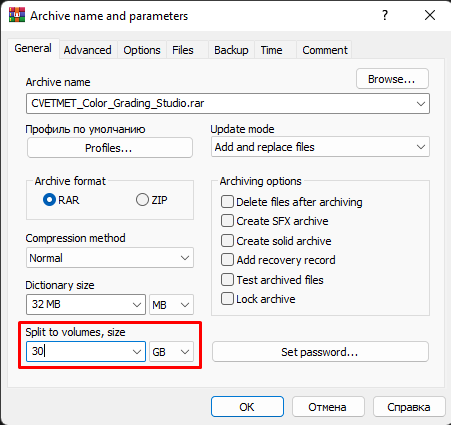
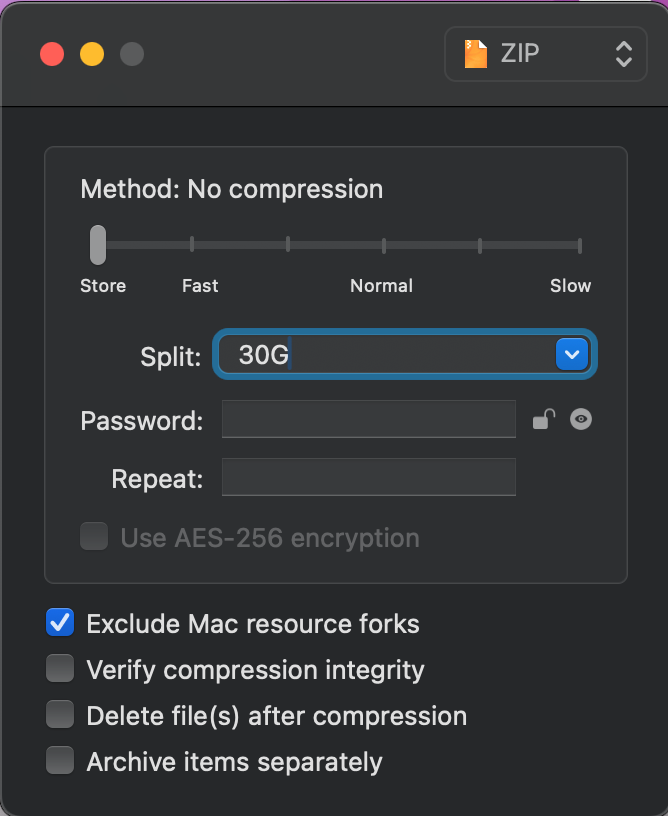
When the files exceed the upload limits of the selected service, add them to an archive and split the archive into several smaller parts.
If the post-production supervisor or post-production producer decides that the final master will be assembled by the colorist, please also provide the final audio mix and final titles, and discuss how any editorial effects should be rebuilt.
You may also send the project on a physical hard drive by courier:
Serbia, 26101, Pančevo, ul. Oslobođenja, 23, stan 44
Nikolai Viktorov
+381 67 7244 136