
Avid Media Composer

1. Create a New Folder on Your Computer
Use this folder to collect all materials required for the project turnover to the colorist.
2. Export an Offline Reference
Export a video file of the sequence that will be delivered for color grading.
The colorist will use this reference to verify that the source media has relinked correctly and that the conformed timeline matches the approved edit.
Whenever possible, include the following burn-in metadata:
- Source Name
- Source Timecode
- Record Timecode
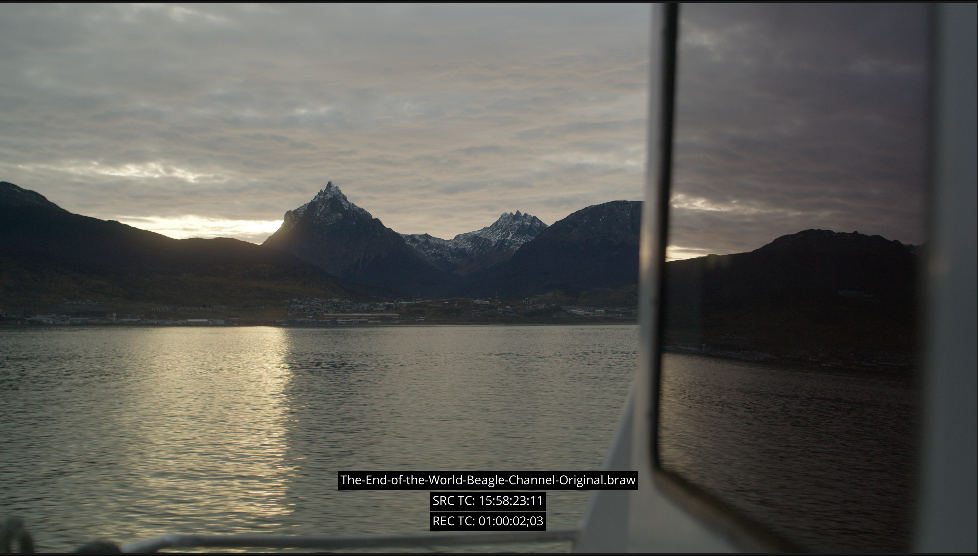
| Codec | DNxHR |
|---|---|
| Type | DNxHR LB |
| Resolution | May be reduced, but the original project aspect ratio must be preserved |
| Frame rate | Как в настройках проекта |
3. Export an AAF
First, identify and locate the original source media used in the sequence.
- Place the picture-locked sequence in a separate bin.
- Open the Fast Menu at the bottom-left corner of the bin and select:
Set Bin Display
- In the window that opens:
— Enable Show Reference Clips
— Enable Master Clips
— Disable Subclips
- Click OK.
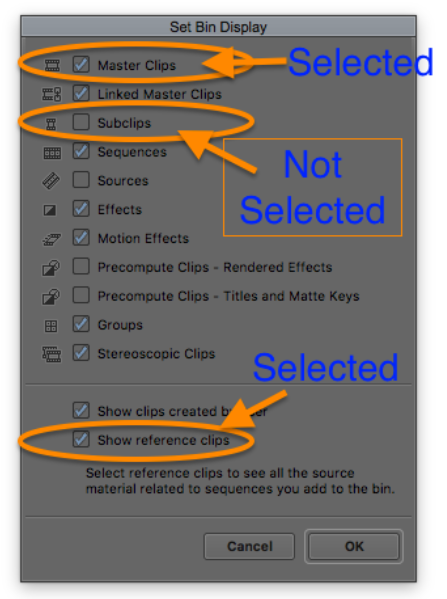
The bin will now display the master clips referenced by the sequence. These clips should retain the original source file names rather than editorial scene or take names.
- Sort the bin by Name to help organize the clips by camera and recording order.
- Right-click a clip and select Reveal File to locate the corresponding source media.
- Repeat this process as required for other cameras, recording days, or source locations.
- Copy all original source media used in the sequence to the turnover folder while preserving the original folder structure.
After locating and copying the required source media, export the AAF:
- Select the picture-locked sequence.
- Right-click and select:
Output → Export to File
- In the Export As window, select an existing AAF preset from the Export Setting menu.
If no suitable preset is available, select Untitled and click Options.
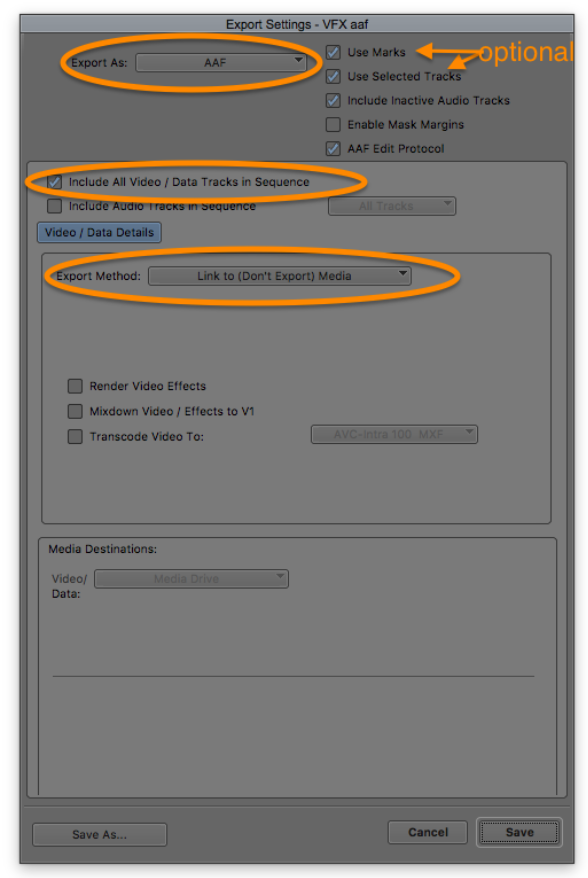
In the Export Settings window, use:
| Setting | Value |
| Export As | AAF |
| Tracks | Include All Video/Data Tracks in Sequence |
| Export Method | Link to (Don’t Export) Media |
If required, enable Use Marks or Use Selected Tracks to export only a specific section or selected video tracks.
Click Save, choose the turnover folder as the destination, enter a clear file name, and save the AAF.
4. Upload the Prepared Folder to Our FTP Server
The folder should contain:
- Original source media
- Offline Reference Clip
- AAF
We recommend using FileZilla for file transfers. It provides fast and stable uploads and can automatically resume interrupted transfers.
After launching FileZilla, enter the following information in the bar at the top of the application:
- Host
- Username
- Password
- Port
To receive your access details, contact us via ✈️ Telegram or 📩 email.
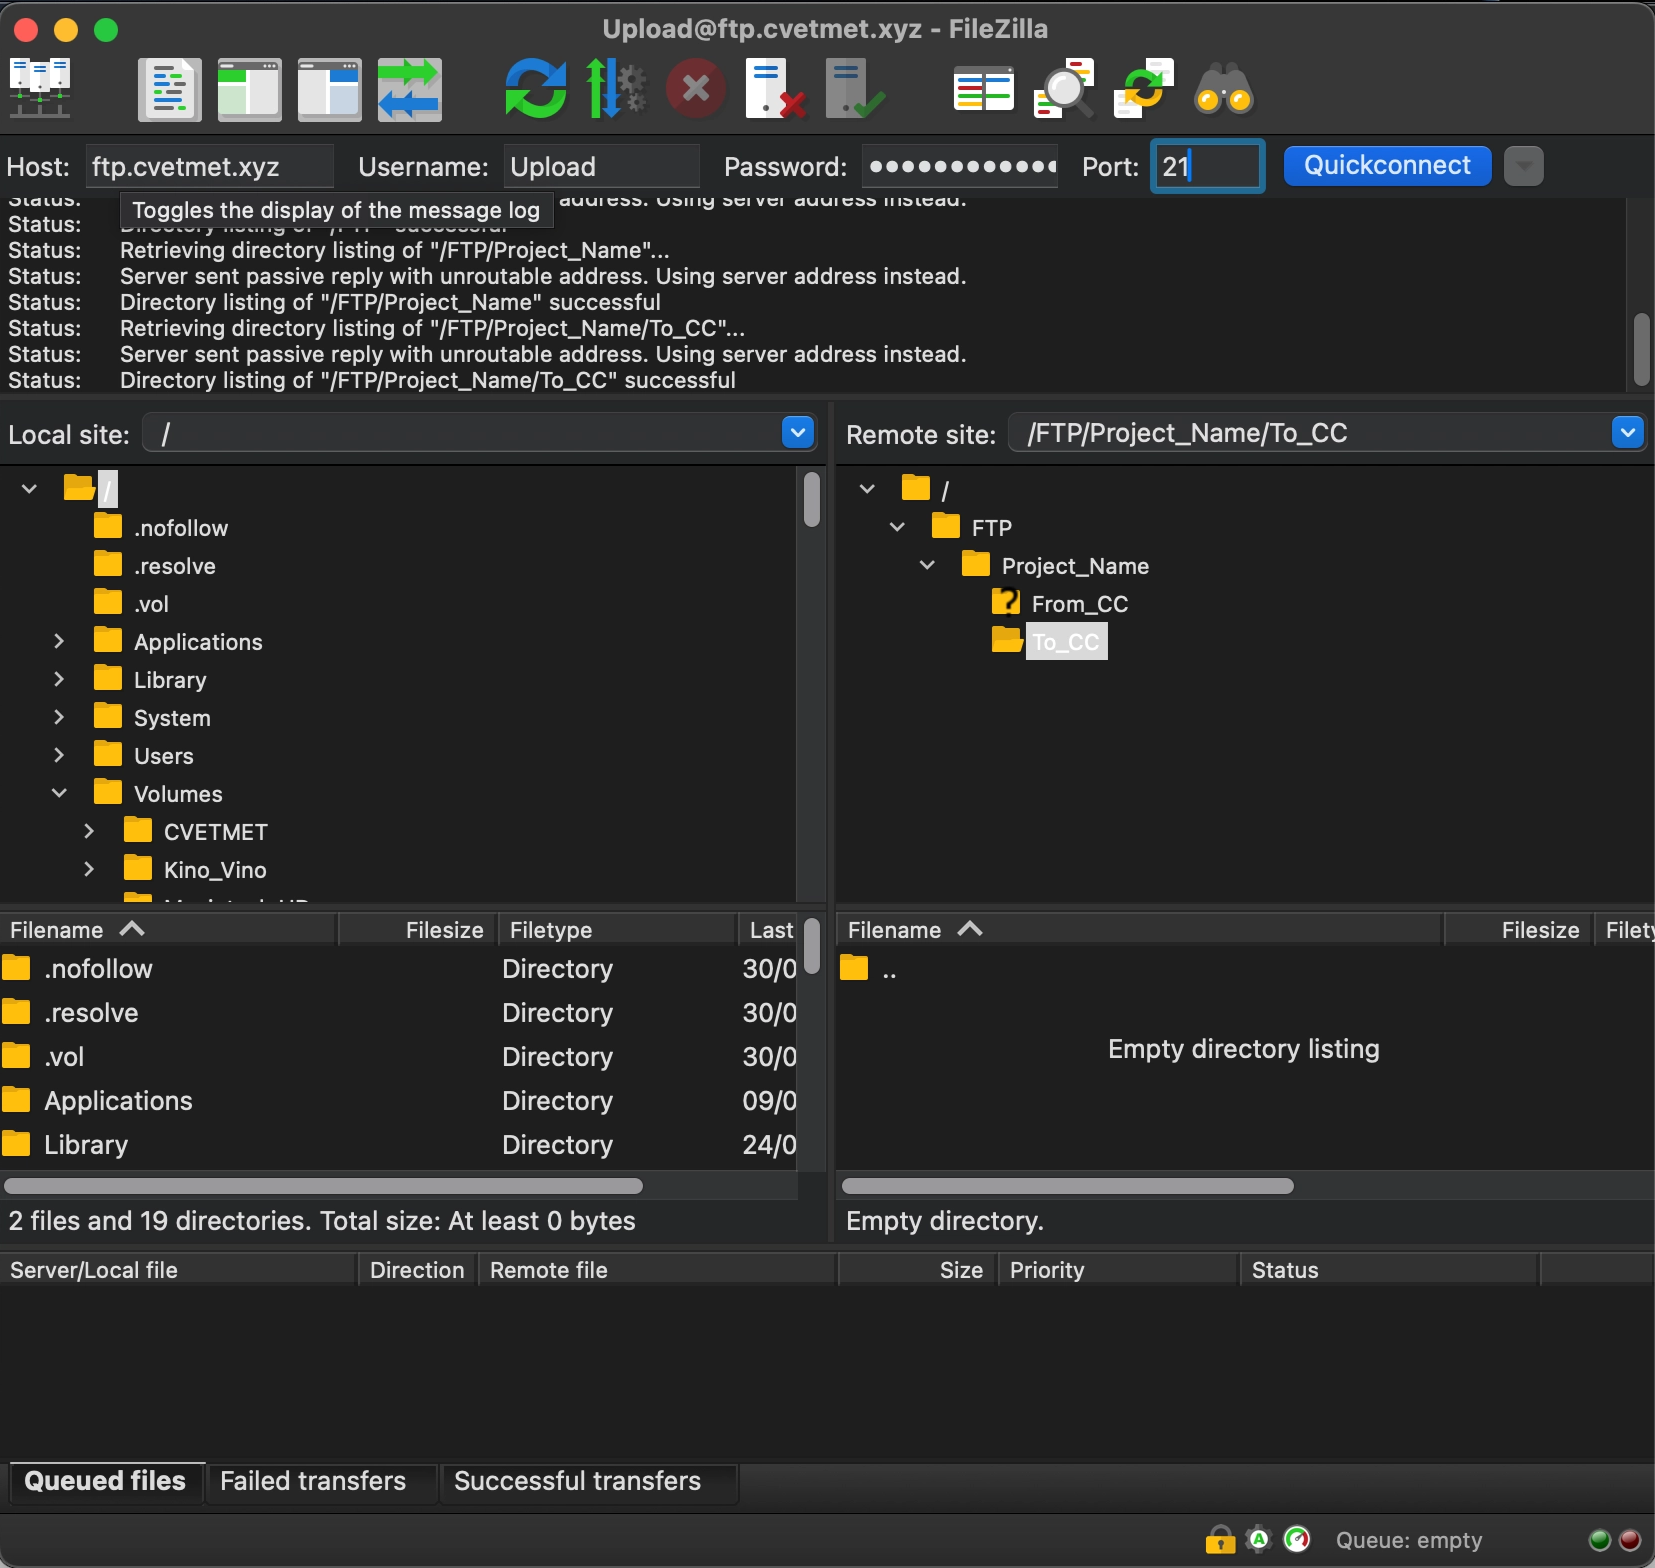
Upload all materials intended for color grading to:
To_CC — To Color Correction
After color grading is complete, the final deliverables will be available in:
From_CC — From Color Correction
When direct server transfer is not available, you may use Google Drive, Dropbox, WeTransfer, MyAirBridge, Yandex Disk, or another cloud storage or file-transfer service.
How can I transfer more than 50 GB using cloud storage?
When the files exceed the upload limits of the selected service, add them to an archive and split the archive into several smaller parts.
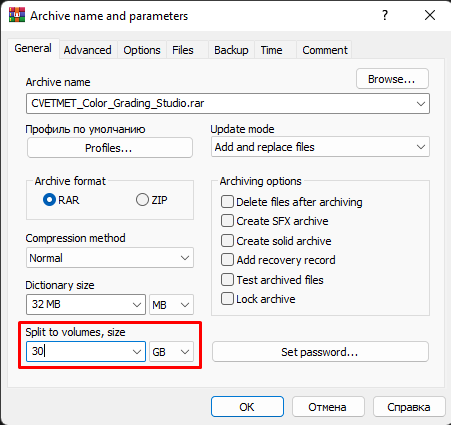
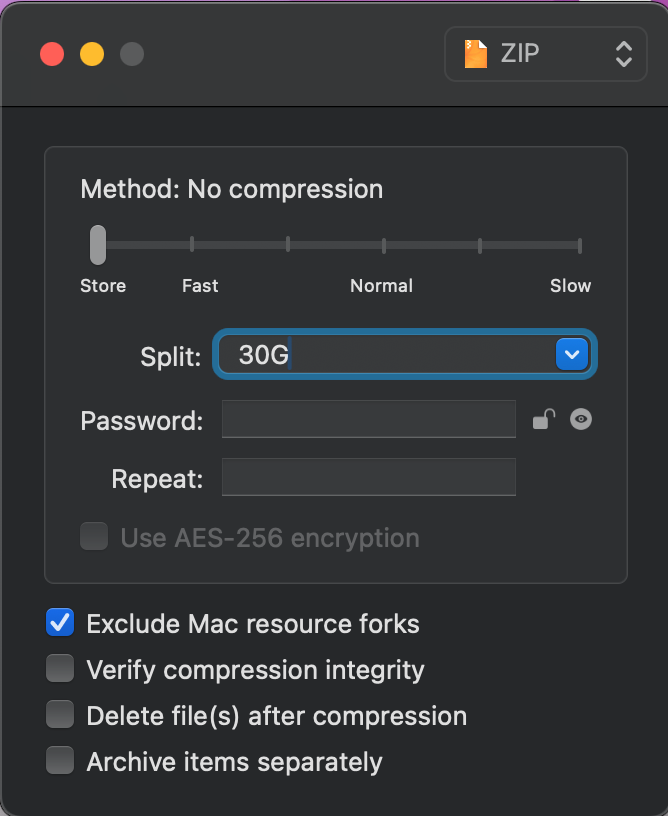
If the post-production supervisor or post-production producer decides that the final master will be assembled by the colorist, please also provide the final audio mix and final titles, and discuss how any editorial effects should be rebuilt.
You may also send the project on a physical hard drive by courier:
Serbia, 26101, Pančevo, ul. Oslobođenja, 23, stan 44
Nikolai Viktorov
+381 67 7244 136