
Avid Media Composer
1. Создайте новую директорию на вашем компьютере
В ней вы будете собирать материалы необходимые для передачи проекта колористу.
2. Экспортируйте Offline Reference Clip
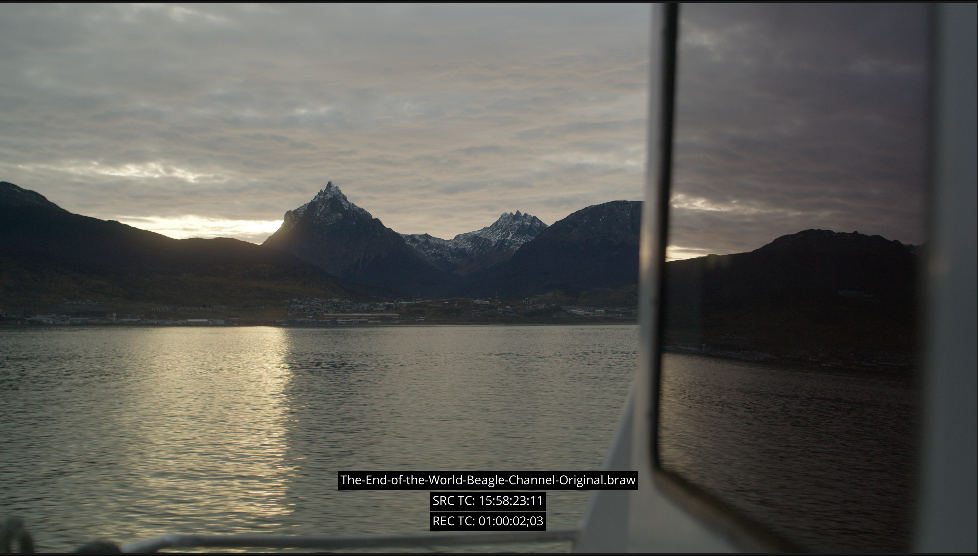
Видеофайл с залоченным монтажом, который вы будете передавать на цветокоррекцию. Его колорист будет использовать для сверки, что все исходные файлы и таймлиния передались корректно.
Предпочтительно, чтобы в нём ещё присуствовали запеченные мета-данные Source Name, Source TC, Rec TC.
| Codec | DNxHR |
|---|---|
| Type | DNxHR LB |
| Resolution | Можно снизить, но необходимо сохранить соотношение сторон как в настройках проекта |
| Frame rate | Как в настройках проекта |
3. Экспортируйте AAF
Identify the source files you’ll need. This will usually be the original Camera files:
- Make sure your sequence is in a bin by itself.
- From the fast menu (hamburger) at the bottom left of the bin, choose “Set Bin Display”.
- From the ensuing pop-up, select “Show Reference Clips” (at the bottom of the window) and “Master Clips” and deselect “Subclips”. Then click ‘OK’.
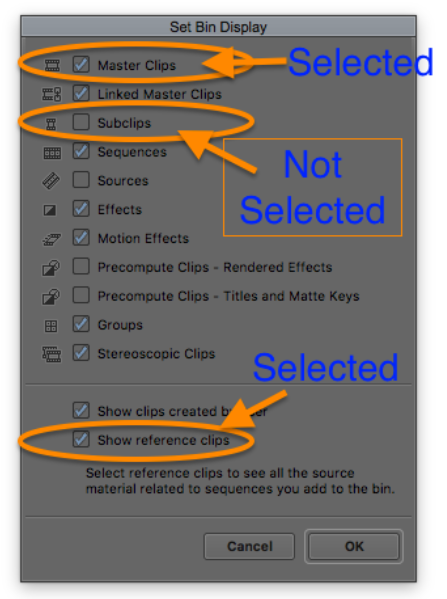
- This will populate your bin with the clips used in the sequence. These will be the Master Clips, which have the original camera file names, not the scene/take names.
- Sort the bin by name so that the clips are in chronological order by camera.
- Right-click on the first clip and select ‘Reveal File’.
- Take note of the folder that the file is in. It will be in a 3-digit format where the first digit is the Shooting Block number and the last two the shoot day (e.g., 302 is block 3 day 2).
- Repeat the process for the last clip in the bin just in case the scene spanned multiple days.
- Beware of B cam clips, as they will affect the sort order in the bin. i.e., the clips will be listed chronologically on A cam first and then B cam, so the last A cam clip won’t be at the bottom of the bin but somewhere in the middle.
Once you’ve identified and located the original files, you can export your AAF. To do this:
- Right-click in the Record/Timeline monitor and choose ‘Export…’.
- In the ‘Export As…’ window, select an AAF option from the ‘Export Setting’ pop-up menu if one exists, otherwise select ‘Untitled’ and then click the ‘Options…’ button.
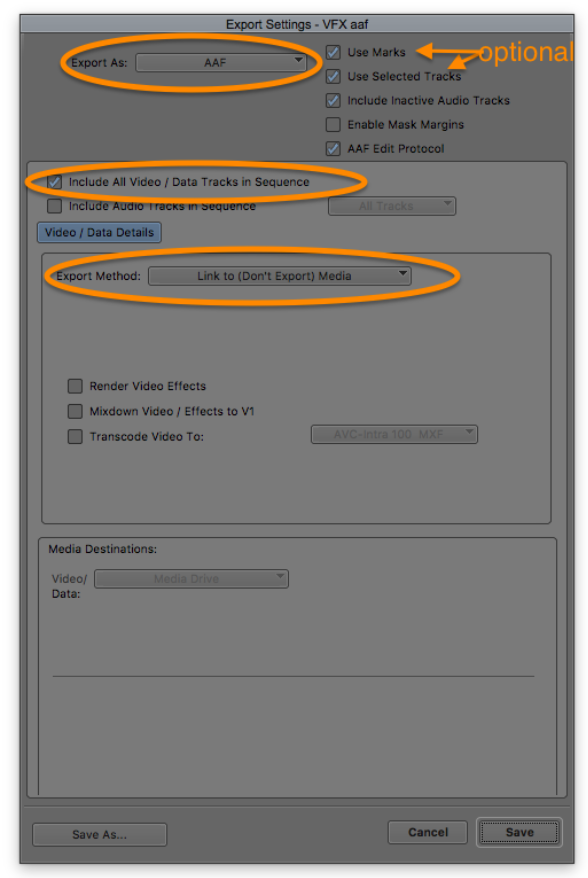
- In the Export Settings window, choose ‘AAF’ as the file type, ‘Include All Video/Data Tracks in Sequence’, and ‘Link to (Don’t Export) Media’ as the ‘Export Method’. If required, you can check the ‘Use Marks’ and ‘Use Selected Tracks’ buttons (e.g., if you want to disregard any title or effect layers you have above the video tracks).
- Click Save.
- Back in the ‘Export As…’ window, choose your save destination and name your export.
- Click Save.
4. Загрузите подготовленную директорию на наш FTP-сервер
— Offline Reference Clip
— AAF
Для передачи материалов рекомендуется использование FileZilla. Она обеспечивает быструю и стабильную передачу файлов, а также поддерживает докачку при разрыве соединения.
После запуска FileZilla в верхней части введите Host, Username, Password и Port. Для получения данных доступа, напишите мне в ✈️ телеграм или на 📩 электронную почту.
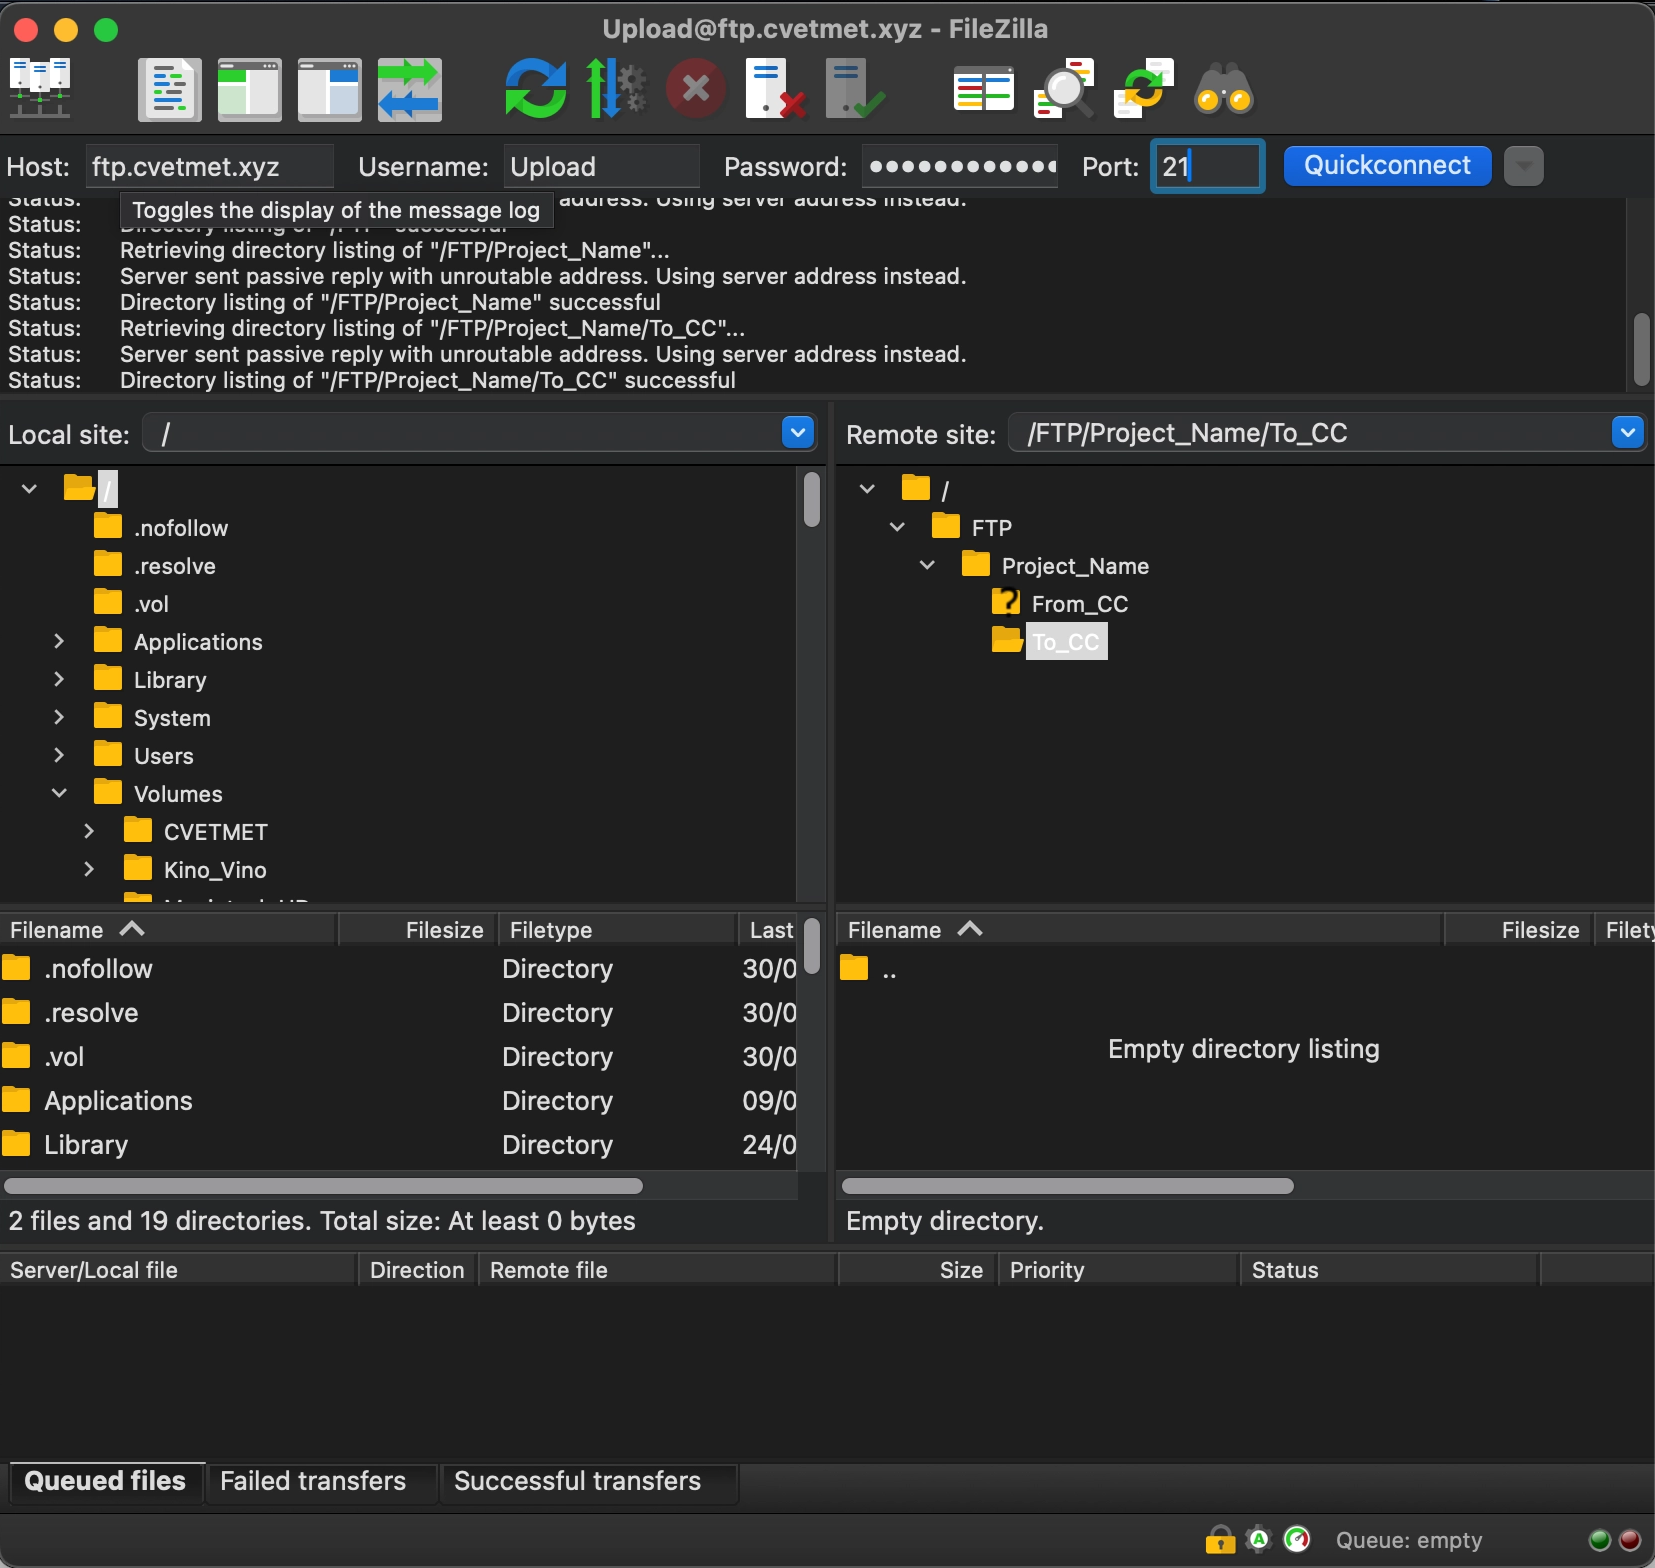
Для загрузки материалов для цветокоррекции используйте папку To_CC (To Color Correction). После завершения цветокоррекции готовые материалы будут доступны в папке From_CC (From Color Correction).
Если передача по FTP невозможна, вы можете воспользоваться Yandex.Disk, Google Drive, Dropbox, WeTransfer, MyAirBridge и другими облачными сервисами.
Как передать через облачное хранилище файлы больше 50 ГБ?
Если файлы для передачи занимают больше 50 ГБ, а вам необходимо передать их через облако добавьте их в архив и разделите его на части меньшего объёма.
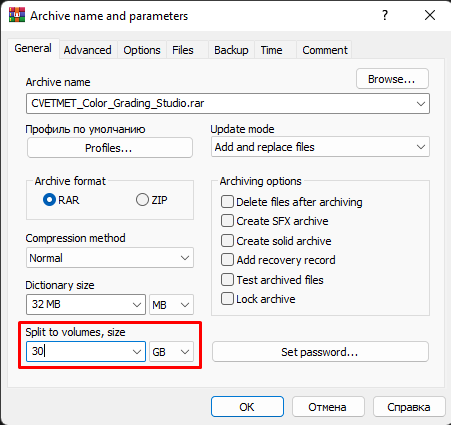
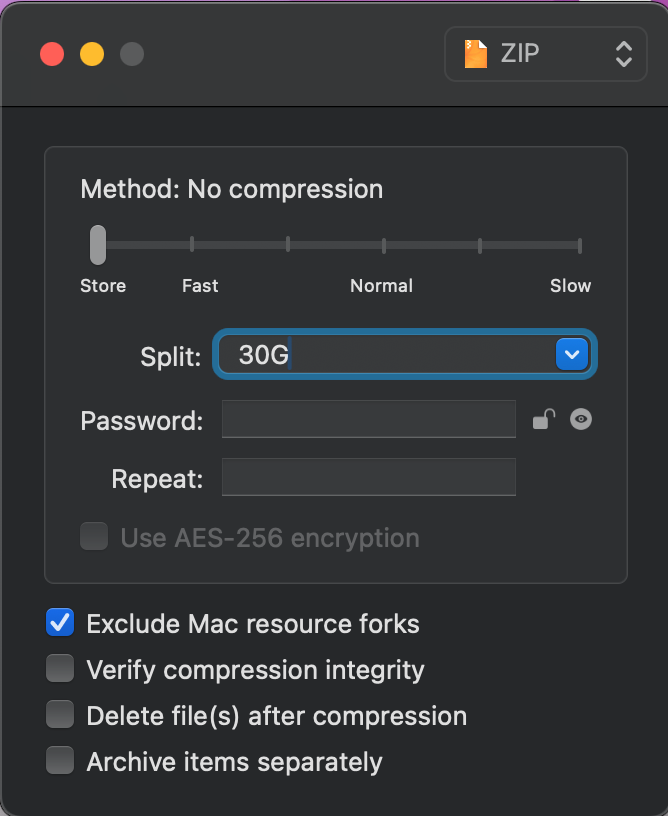
Если супервайзер / пост-продакшн продюсер принял решение собирать мастер-копию силами колориста, необходимо дополнительно передать готовый звук, титры), обсудить методы восстановления эффектов.
Также вы можете отправить жёсткий диск службой доставки, если не хотите использовать интернет для передачи материалов:
Serbia, 26101, Pančevo, ul. Oslobođenja, 23, stan 44
Nikolai Viktorov
+381 67 7244 136